7 top tips to make Lantum work for you as a locum GP
Locum work allows for a lot of flexibility in your schedule, but finding sessions and building good relationships with practices can be hard and time-consuming.
Whether you’re just getting started as a GP on Lantum or already understand the basics, we’ve put together a guide of 7 top tips to help you maximise your Lantum experience.
#1. Follow the practices you like working for
To follow a practice, find a session they’ve posted and click Details to open more information about the job.
Scroll down to the Practice Information section, then click Follow next to the practice name. Once you’ve followed a practice, you’ll see sessions from them in the Practices I follow section. Following a practice makes it easier to find and apply for sessions with the practices you like working at the most.
#2. Find work you're best suited for with job search filters
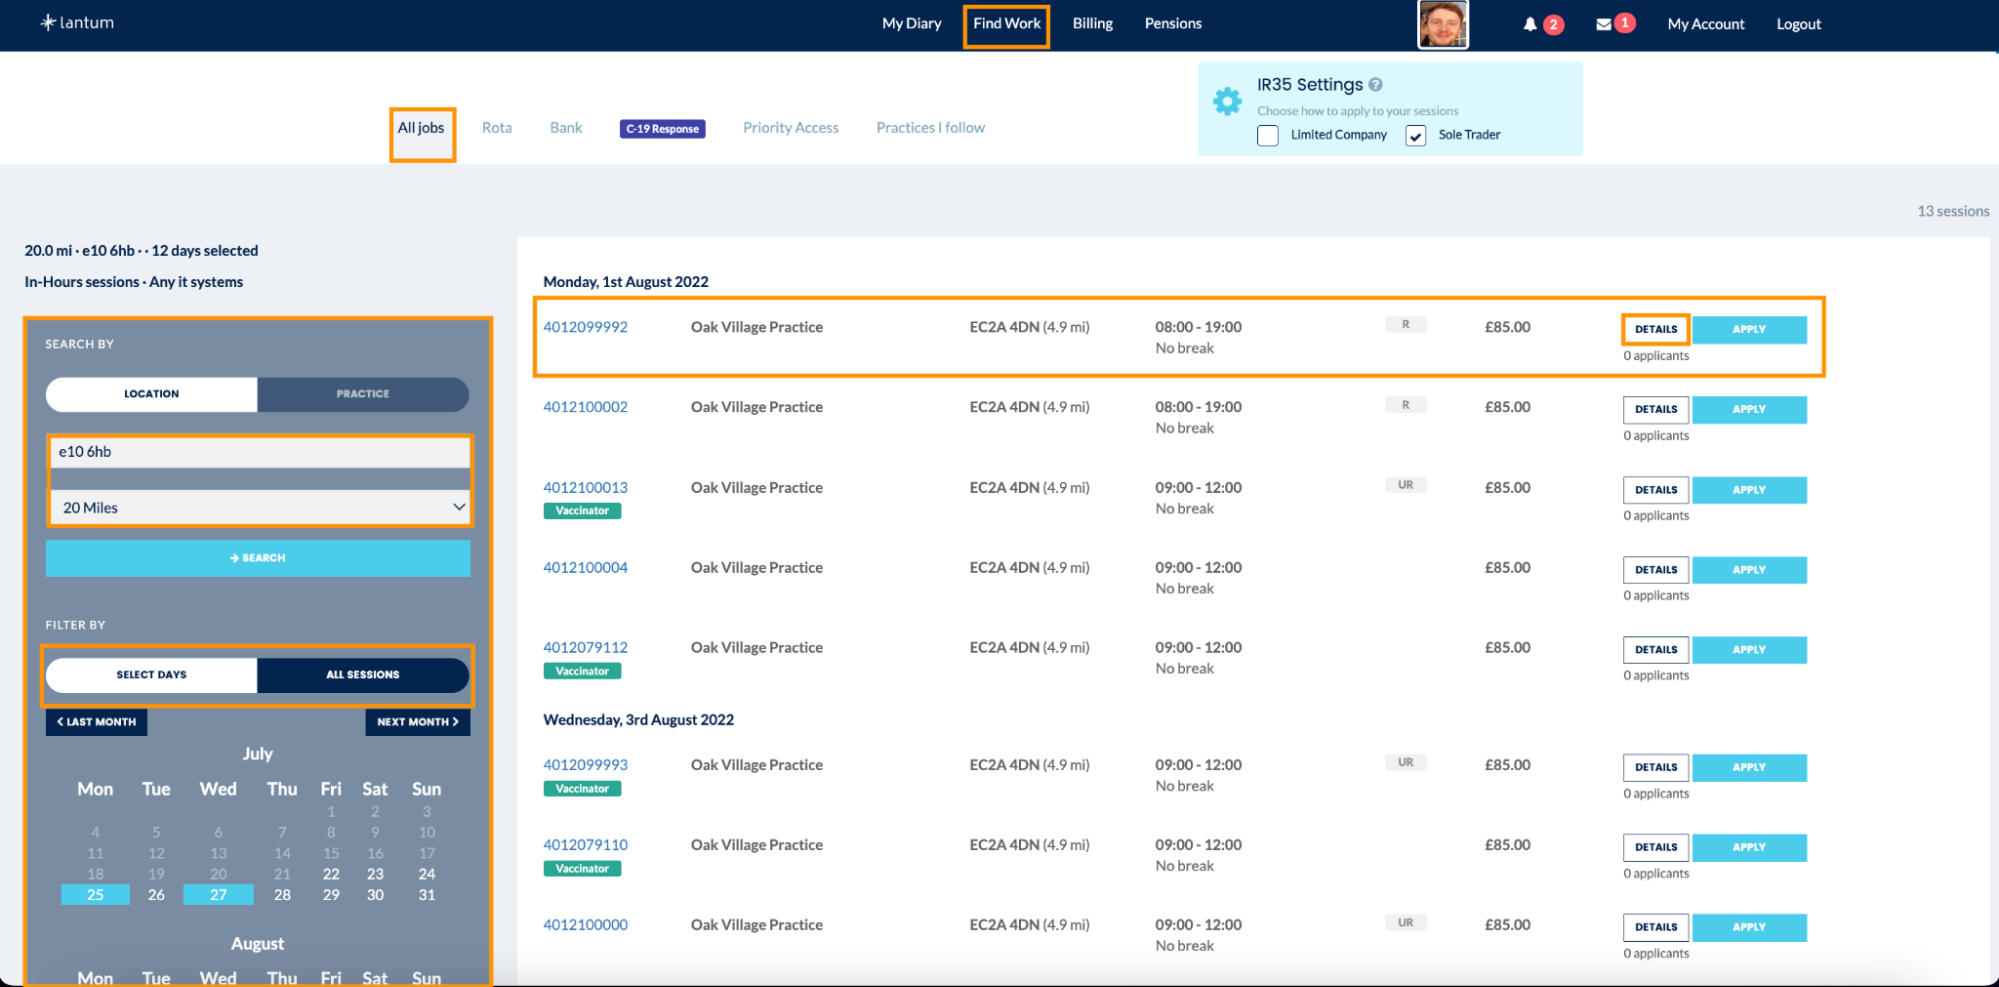
If you’re looking for sessions to work, navigate to the Find Work tab. You’ll see a range of filters designed to help you narrow down your search and find the right working environment.
Enter your postcode and choose how far you’d like to travel. You can also narrow the search even further by selecting:
- The days you want to work
- The IT system(s) you want to work with
- Specific job requirements like PPE, working from home, or nurse support
- The type of session you want to work (in-hours, out-of-hours, urgent care, etc.)
Once you’ve selected all your preferences, browse available sessions. Select Apply to send in an application or Details to learn more about the shift.

You may see the option to Instant book sessions at certain practices. Instant book lets you immediately apply for and book the session without needing clinic approval. If you don’t have instant book set up with one of your preferred practices, speak to them directly about it to make it easier to work together in the future.
#3. Set your availability
Use My Diary to set the days and times you’re available to work.
Not only does this let practice managers know when you’re unavailable, but it also automatically filters your Find Work page so you’re not wasting time scrolling through jobs that don’t match your availability.
#4. Process your invoices as soon as you complete a session
Process your invoices after each session or on a regular basis so you don't end up waiting for payment. Or even better, sign up for Lantum’s next-day payment service, Rocketpay and you’ll get paid the day after you work the session.
Find your invoices in the Billing section. After you work a session, view the timesheet. If everything looks correct, select Generate invoice at the bottom of the timesheet. If you need to make corrections, select Amend then save and submit.

#5. Make your profile stand out from the crowd
Fill out the About Me section in your Profile tab to really make your applications stand out. Telling managers a bit about you and your background makes it easy for them to make a quick decision on whether or not you’re right for a job.
Add information about the systems you’ve been trained on and your qualifications for an even quicker response.
#6. Upload more documents to qualify for even more jobs
All you need to start finding work on Lantum is your CV, passport and DBS certificate.
Some places, like Urgent Treatment Centres, often have more complicated requirements. The more documents you upload, the more likely it is that your application will be successful.
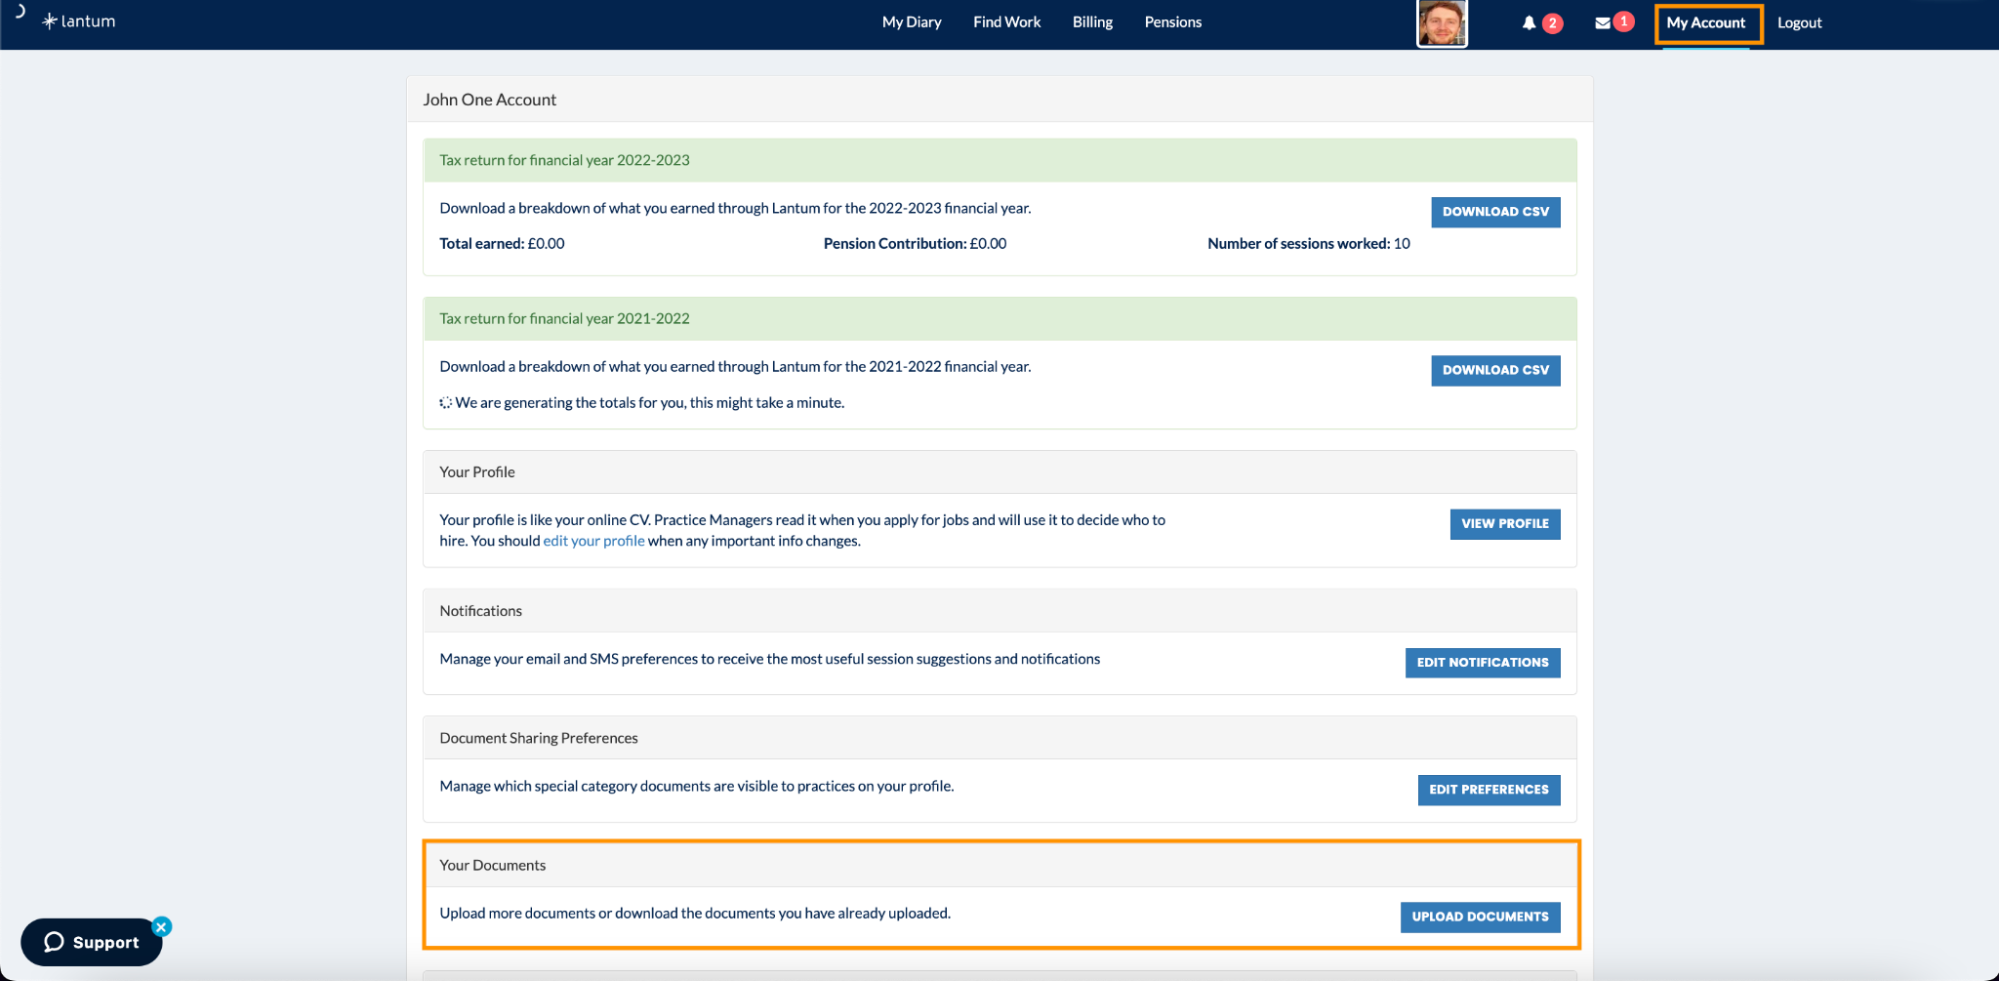
To upload documents, click on My Account, scroll down to Your Documents and click Upload Documents.

#7. Link your Lantum calendar with your personal calendar
Make it easy to coordinate your sessions with other commitments when you connect your Lantum calendar with your personal calendar.
Go to My Diary, then click Link calendar to get the URL you need to add it to your personal calendar.
That’s it! Adopt these tips and it’ll be even easier and more efficient to find the work that you want.
Have more questions about getting started with Lantum? Read our FAQs or get in touch with our team by submitting a request.


